

Custom H Beam Shot Blasting Machine Factory for Precision Surface Preparation
2026-11-16
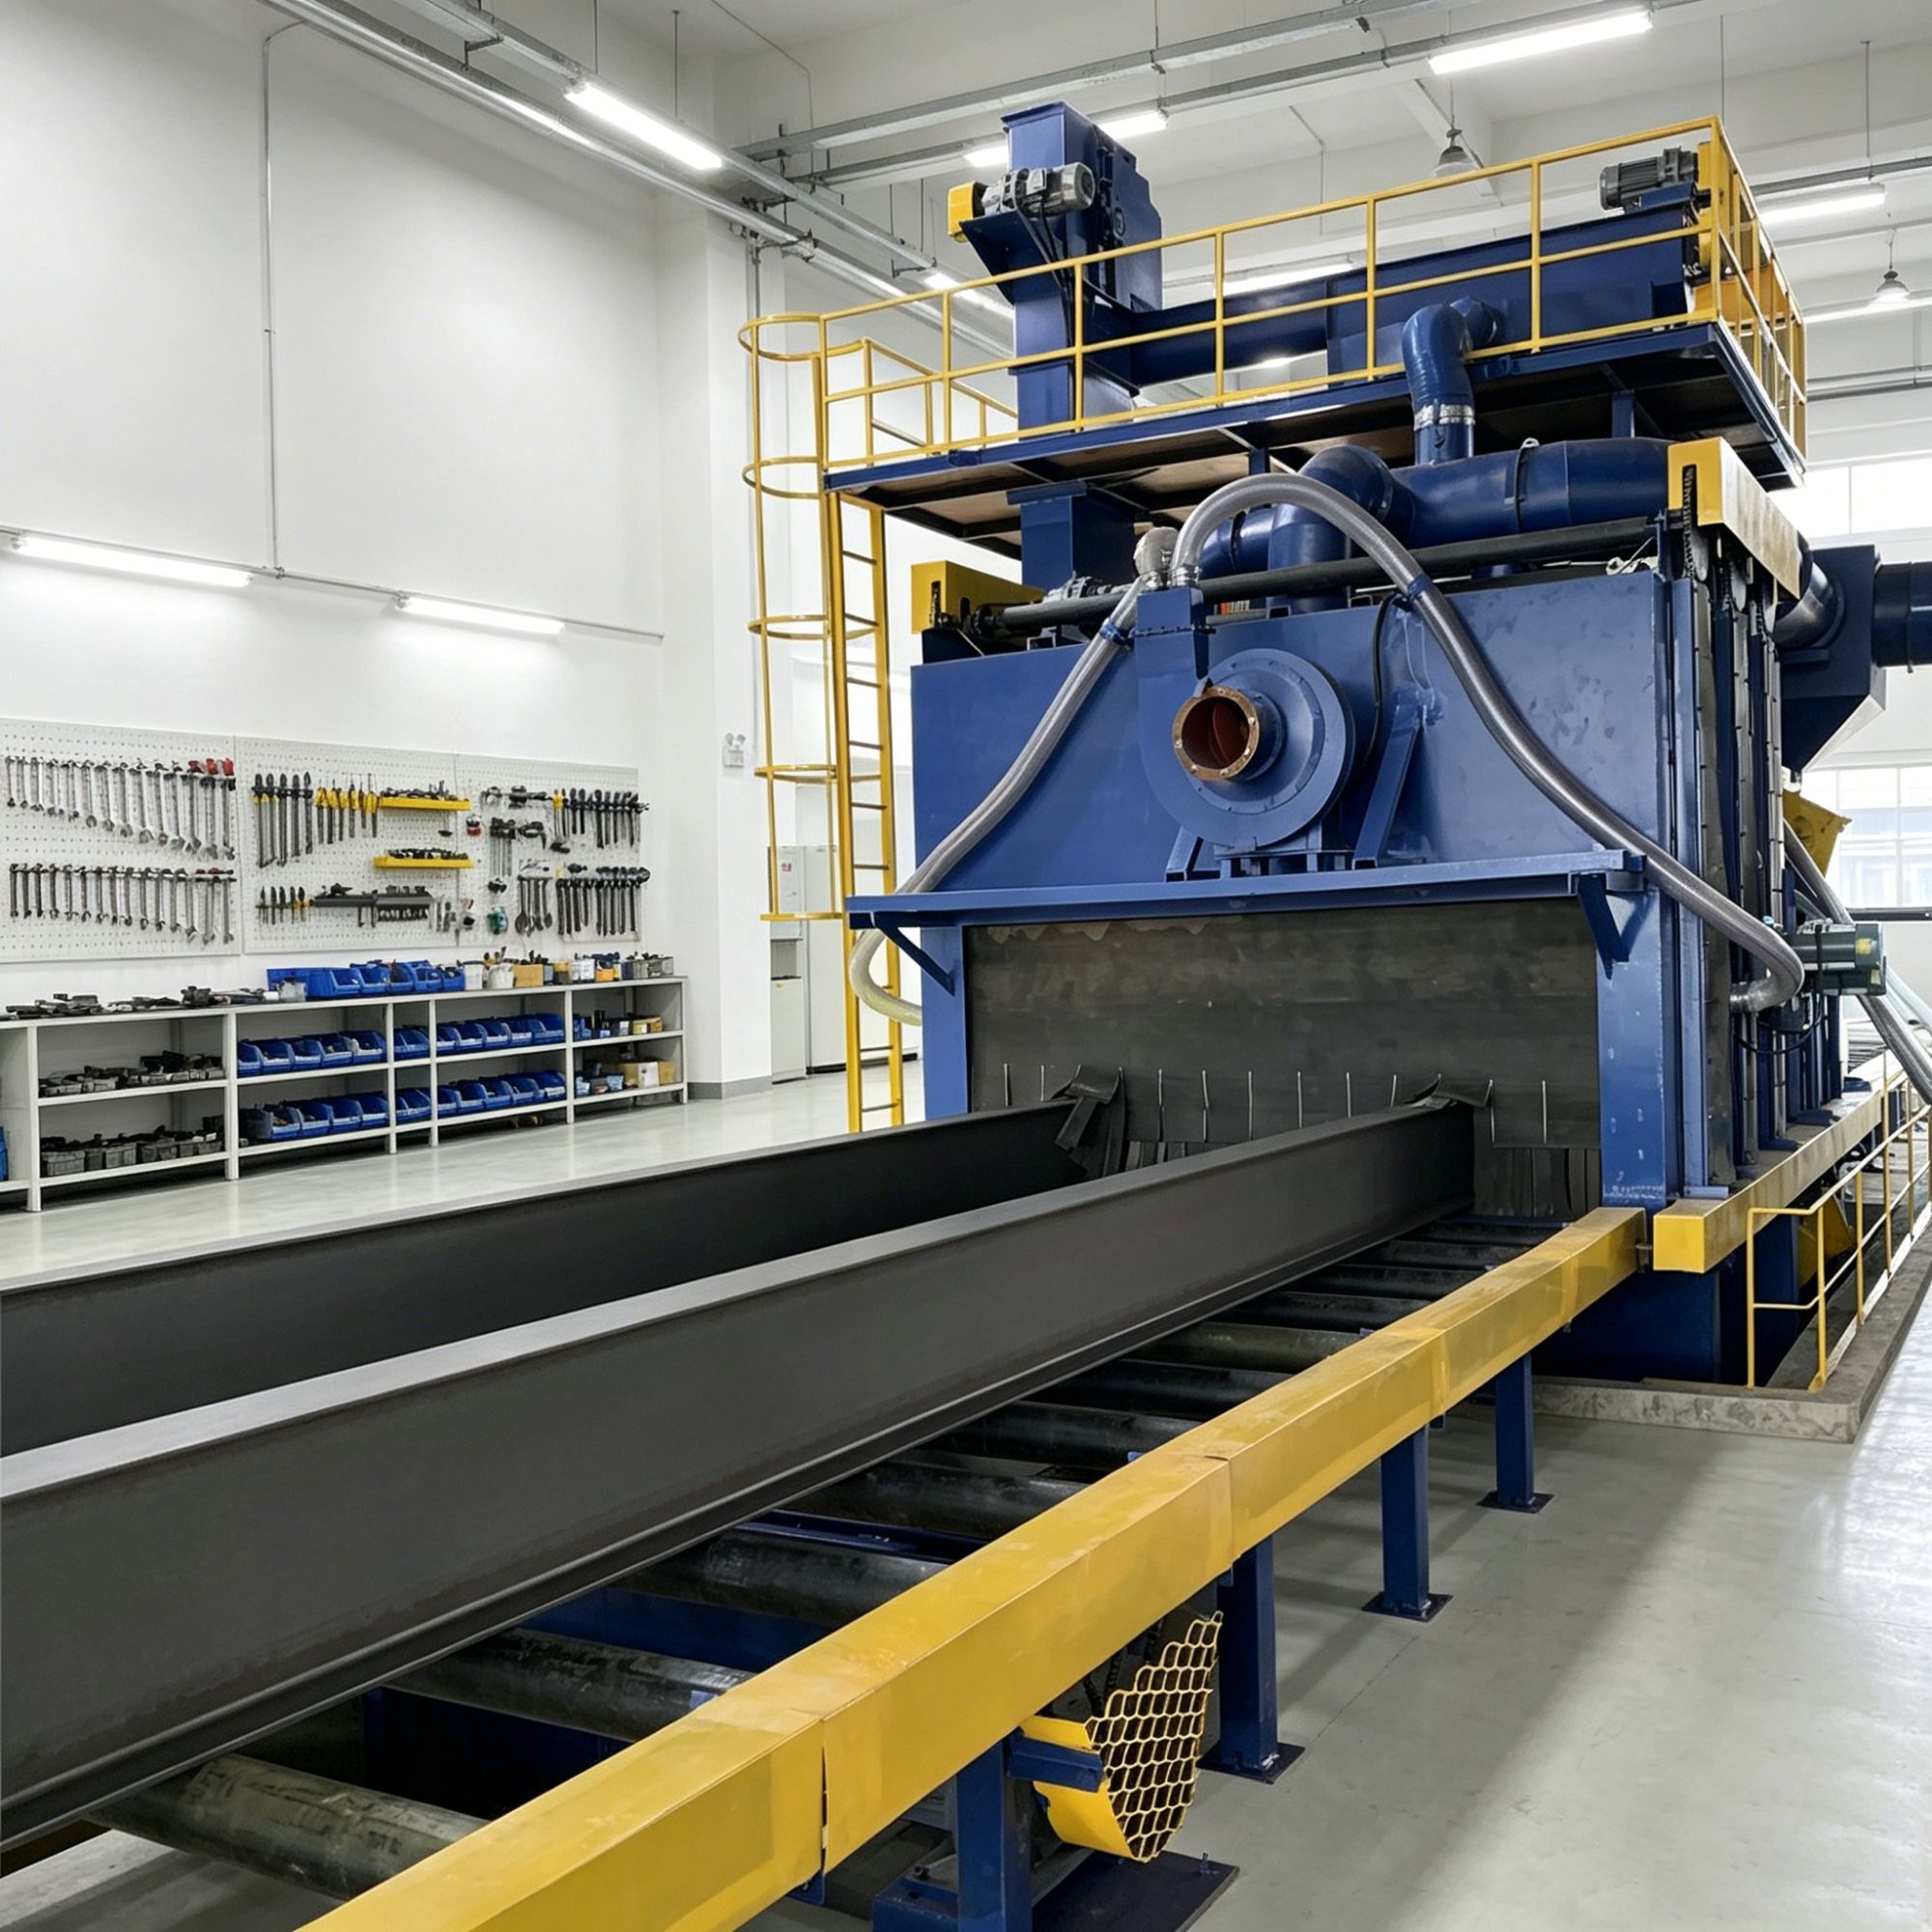
For fabricators tired of adapting their process to off-the-shelf blast systems, PuHua turns the equation around. As a factory specializing in custom H beam shot blasting machines, we engineer every turbine angle, abrasive flow, and workpiece fixture around your precision surface preparation targets—so what leaves the line is exactly the profile you specified, not an approximation. Here’s what that means for your next heavy steel project.
Reading H-Beam Profiles Before Blast Settings Are Locked
Before any abrasive parameters get finalized, the actual dimensions and flange geometry of each H-beam need to be pulled from the shop drawings or measured directly on the stock. A slight mismatch between the nominal profile and the real beam—often from mill tolerances or accumulated heat distortion—can shift the blast pattern enough to leave shadowed areas along the web-to-flange junction. Reading the profile early means comparing the listed depth, flange width, and thickness against what is actually sitting on the infeed conveyor, then noting any camber or sweep that might change the standoff distance.
Once those numbers are in hand, the nozzle angles, travel speed, and abrasive flow can be set with a much smaller margin for guesswork. Operators who skip this step tend to lock in settings based on the last run, which may have been a completely different beam series. That habit leads to uneven anchor profiles, rework near the radiused fillets, or excessive abrasive consumption on areas that did not need aggressive cleaning. Taking a few minutes to read the profiles first keeps the locked settings honest to the steel that is actually about to pass through the booth.
Abrasive Mix Adjustments for Mill Scale and Pitting
Mill scale isn't just surface rust—it's a dense, brittle oxide layer that laughs at light abrasives. When you're also dealing with pitting, the challenge doubles because aggressive media can gouge the edges of pits and leave new stress risers. The usual fix is to stop relying on a single abrasive and start blending.
A practical starting mix for heavy mill scale with scattered pitting is 70% angular steel grit (G40 or G50) and 30% garnet or aluminum oxide in the 60-80 mesh range. The steel grit fractures the scale quickly, while the finer mineral abrasive digs into the pits without smearing over them. If the pits are deep, shift to a 50/50 blend and drop the grit size—too much large grit will round off pit edges and hide the defect instead of cleaning it.
After each pass, check the surface under low-angle light. If the mill scale is gone but the pits look polished rather than clean, cut back the garnet by 10% and add more steel grit. Conversely, if the pits are opening up too fast and losing their original shape, reduce the grit size and increase air pressure slightly rather than adding more fine abrasive.
Why Conveyor Speed Dictates Surface Consistency
When the line runs too fast, coating particles don't get enough time to level before the part enters the cure oven. That brief loss of flow-out shows up later as a rougher feel, uneven gloss, or thin edges that fail a dry film thickness check. Operators often chase these defects by adjusting gun settings or oven temperatures, but the real culprit is simply the speed setting on the drive panel.
Slow the conveyor down and the same part picks up more powder or liquid, giving the film a chance to settle into a smooth, continuous layer with consistent thickness across the profile. The trade-off is throughput, of course. A line that crawls at two feet per minute might produce beautiful finishes but leaves the packing station waiting. The trick is finding the narrow band where viscosity, particle size, and part geometry all line up with the travel speed.
That's why experienced finishers treat conveyor speed as a process variable, not a fixed number. A change in ambient humidity or a new batch of powder can shift the ideal setting by several feet per minute. Watching the surface under a bright inspection light tells you more than any timer ever will.
Nozzle Layouts That Reach Into Web Corners
Most fixed spray bars treat a web as a flat sheet, but the real trouble hides where strands meet. A straight-on nozzle floods the open cells while the corner junctions stay dry or hold residue. The problem gets worse with fine mesh, because the fluid deflects off the first contact point and never wraps around the back side of a strand.
A better layout staggers nozzles at alternating angles, some aimed almost parallel to the web surface. This creates a slicing jet that follows the strand lines into the corners instead of bouncing off them. Pairing a narrow fan tip with a low-flow air assist helps push fluid deep into the intersections without tearing delicate meshes.
In practice, this means fewer passes to get a clean, even coating or rinse. The corner coverage also reduces static buildup on synthetic webs, since charged particles don't hide in the junction shadows. Adjusting the nozzle spacing to the mesh pitch keeps the pattern tight without overlapping too much, which saves fluid and keeps pressure stable.
Dust Collection Without Overshooting Finish Quality
Dust collection often gets framed as a brute-force problem—more CFM, bigger ducts, a cyclone with a five-horse motor. But when you're spraying or wiping a finish, the goal isn't just pulling chips out of the air; it's keeping fine particulates from settling into a wet coat. That means tuning the capture point, not just the fan size. A well-placed hood at the tool, paired with modest airflow, can outperform a monster collector that stirs up as much as it removes. Static pressure losses in flex hose and sharp elbows quietly eat performance, so short, straight runs and gradual bends matter more than raw horsepower.
The finish room adds another layer. Overshooting airflow across a fresh finish can create drafts that cause orange peel, solvent flash, or dust tracks where particles get blown into the surface. A better approach is negative pressure at the source—capturing dust before it becomes airborne—combined with low-velocity ambient filtration. HEPA-rated filters on the collector or a separate air cleaner keep sub-5-micron particles out of the equation without blasting air across the project. You want the air to move enough to clear the room, but not so much that the finish skims over before it levels.
Practical checks matter. A smoke tube or incense stick near the sanding station reveals whether the hood is actually capturing or just creating turbulence. Watching how finish behaves under the exhaust tells you if the airflow is too aggressive. Small adjustments—moving the pickup an inch, reducing a blast gate opening, adding a diffuser—often solve both dust and finish defects at once. It's less about buying a bigger system and more about matching the airflow to the task so the surface stays clean without fighting the collection setup.
Pre-Shipment Trials on Your Own Beam Samples
Before anything gets crated, we run trials on the beam samples you provide. Not generic material from our rack—your actual beams, with the same dimensions, grade, and surface condition you'll use in production. This allows us to adjust clamping pressure, feed rates, and power settings so the machine handles your specific material correctly.
Every trial is recorded with detailed photos and measurement data. If something doesn't meet the agreed tolerance, we tweak the setup and run the sample again. You get a copy of the results before shipping, so there are no surprises.
Once the machine arrives at your site, it's already configured for your beams. That means minimal setup time, fewer rejected parts, and a faster ramp-up to full production.
FAQ
We design each machine around the beam dimensions, production speed, and surface finish you actually need, rather than forcing a standard model. The team reviews your workpiece range, handling constraints, and existing line layout before proposing a configuration.
The machines remove mill scale, rust, welding slag, and light coatings from H beams, leaving an even anchor pattern that helps primers and coatings bond reliably. Settings can be tuned for near-white or commercial blast finishes depending on project requirements.
It starts with a technical questionnaire and drawings of your beam profiles. Our engineers then draft a layout with the right blast turbine count, abrasive recycling system, and conveyor speed. After approval, fabrication, testing, and on-site commissioning follow with a detailed handover checklist.
Yes. Adjustable roller conveyors, variable-speed drives, and movable blast heads allow switching between web heights and flange widths within the agreed range. Recipe settings store parameters for repeat jobs, so changeover usually takes minutes rather than hours.
A sealed blast cabinet, cartridge-style dust collectors, and automatic abrasive recovery keep the working area cleaner. Spent abrasive and dust are separated continuously, and the system is designed to meet common workplace exposure limits without excessive filter replacement.
Turbine wheel speed, abrasive flow rate, and conveyor speed are monitored through the control panel. Regular inspections of wear parts and automatic abrasive top-up help maintain stable intensity, and we provide a validation procedure with test coupons if your QA team requires it.
Support includes installation supervision, operator training, spare parts recommendations, and remote troubleshooting. For urgent issues, we can often guide your maintenance crew through adjustments using photos or live video before scheduling an on-site visit.
In most cases, yes. We match the inlet and outlet heights, safety interlocks, and material flow direction to your current handling equipment. If needed, we can also supply transition roller tables or modify the blast chamber layout to fit the available floor space.
Conclusion
A custom H beam shot blasting machine built around real workpiece geometry starts before any settings are locked. We read the actual H-beam profiles—flange widths, web depths, fillet radii—because a one-size-fits-all blast recipe rarely strips mill scale evenly or reaches the stubborn corners. The abrasive mix is then tuned: harder, angular grit for heavy mill scale and pitting, balanced with rounder media to avoid embedding or over-roughing the surface. Conveyor speed gets matched to the beam weight and cross-section so every inch sees the same dwell time under the blast stream. That is what keeps the anchor profile uniform instead of wavy or patchy.
Nozzle layout is another area where standard machines fall short. We angle and stagger nozzles to throw abrasive into web-to-flange corners, not just the flat faces. Dust collection is sized to pull fines and spent abrasive without dragging away useful media or disturbing the surface finish—negative pressure alone is not enough, the pickup points matter. Before shipment, we run trials on the customer's own beam samples, check the achieved Sa 2.5 or SSPC-SP10 cleanliness and roughness readings, and only then lock the final parameters into the control recipe. That pre-commissioning work means the machine arrives ready for production, not ready for field tuning.
Contact Us
Contact Person: Bruce
Email: [email protected]
Tel/WhatsApp: +86 15166629468
Website: https://www.povalchina.com/